How to Print the Gothic and Prefab Colosseum Terrain Sets
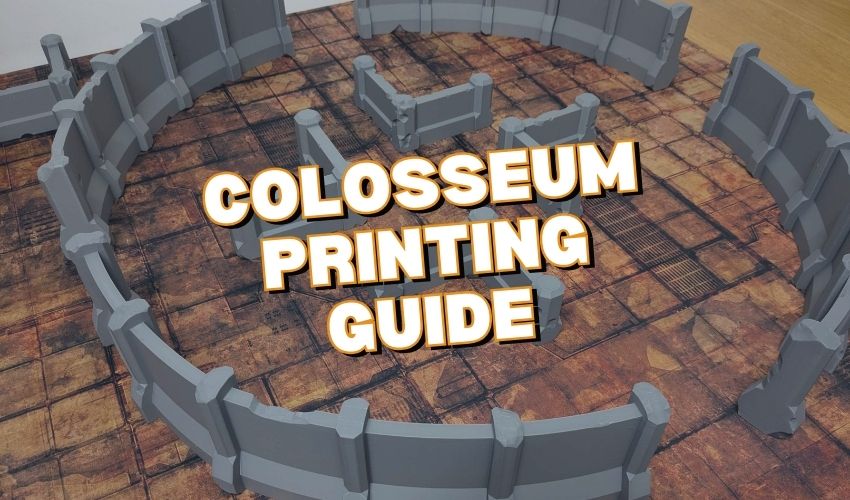
If you’re looking for a Colosseum terrain 3D print guide, you’re in the right place. Since the release of the Gothic Colosseum and Prefab Colosseum STL bundles following the completion of the Kickstarter, I’ve received lots of questions about what exactly needs to be printed to build a full arena setup.
This guide explains everything you need to know to get your Colosseum terrain printed and on the table, whether you’re using a large-format printer or working with a compact setup. Both sets are designed to be modular and flexible, so you can adjust your prints to suit your equipment.
What Is the Colosseum Terrain?
The Colosseum terrain is a modular STL terrain system built for fast-paced skirmish wargames. It’s perfect for games like Kill Team, Necromunda, and other 28mm to 32mm sci-fi systems that benefit from dense cover and defined layouts. The sets come in two versions: the ornate Gothic Colosseum and the more utilitarian Prefab Colosseum. Both are available as digital STL files for 3D printing at home.
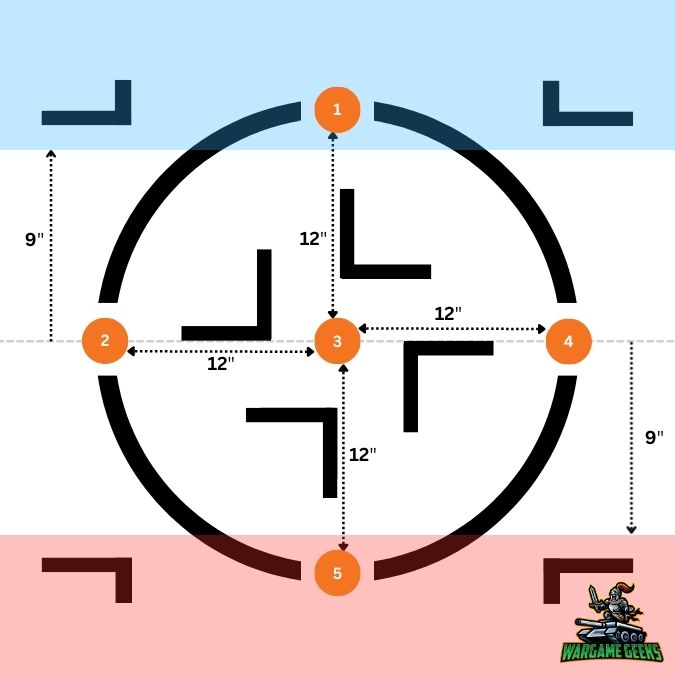
Laying out the Colosseum
I would recommend that the Colosseum is played on a 3×3 gaming area. However, you could do a 4×4 board and it’d work just fine, it’d just have a a bit more external area and some larger deployment zones. The layout guide below shows how it should be setup.
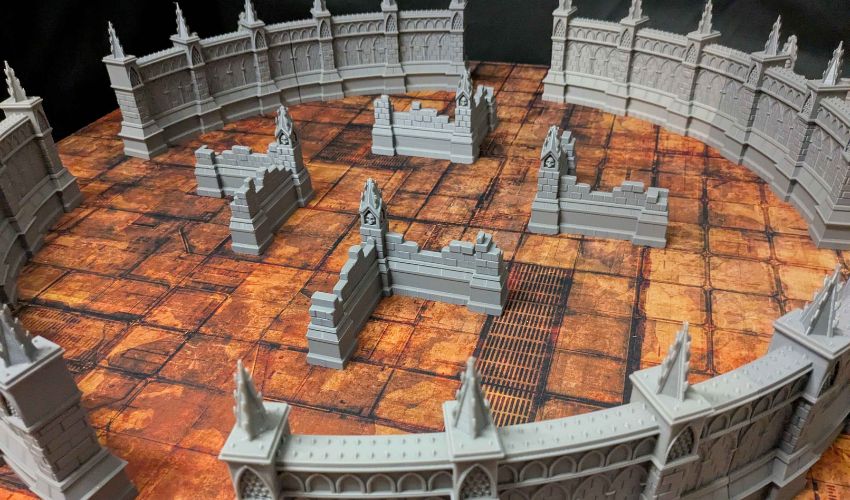
Gothic Colosseum Print Guide
The Gothic Colosseum terrain can be printed in three different configurations, depending on the size of your printer. All versions result in the same full-circle arena sized for a 3×3 gaming mat.
For Larger Print Beds:
If your printer can handle longer parts (typically print beds of 220mm x 220mm or more), go with:
- 4x Female Long Wall Sections
- 4x Male Long Wall Sections
For Mid-Sized Print Beds:
If the long sections don’t fit, you can achieve the same full circle using the medium variant:
- 4x Female Medium Wall Sections
- 4x Male Medium Wall Sections
- 4x Medium Extender Sections
For Smaller Print Beds:
If you’re working with a compact printer, the short wall setup is the most flexible:
- 4x Female Short End Wall Sections
- 4x Male Short End Wall Sections
- 16x Short Extender Sections (4 per wall)
All three of these combinations will result in the same full-sized arena, with tall wall segments that enclose a 3×3 play area. The only difference is how the segments are broken down for ease of printing.
L-Shaped Walls
To complete the arena layout, you will also need to print:
- 4x Interior L-Shaped Wall Sections
- 4x Exterior L-Shaped Wall Sections
These pieces form the four internal and external corners of the Colosseum, breaking up line of sight lanes and adding some cover.
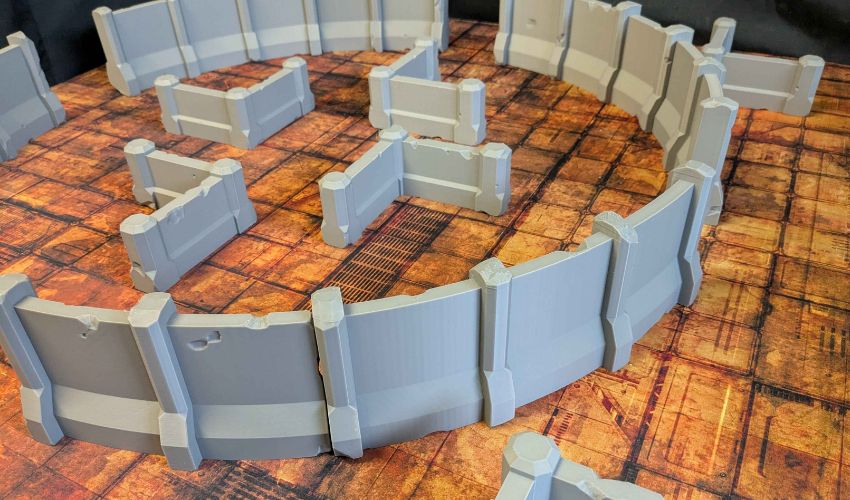
Prefab Colosseum Print Guide
The Prefab Colosseum features a more stripped-back, modular look but follows the same core layout logic. Again, your printer size will determine which parts you’ll want to use.
For Larger Print Beds:
If you have a decent-sized printer, the most straightforward setup is:
- 4x Long Wall Sections (with built-in male connectors)
- 4x Female Medium Wall Sections
Optional: Add wall extenders between the sections to stretch the layout. These parts feature male and female connectors to preserve compatibility.
For Mid-Sized Print Beds:
If long parts are too large for your print volume:
- 4x Male Medium Wall Sections
- 4x Female Medium Wall Sections
- 4x Short Wall Extenders
For Smaller Print Beds:
For the most compact option, suited to small-format printers:
- 4x Male Short Wall Sections
- 4x Female Short Wall Sections
- 4x Medium Extenders (if they fit)
- If Medium Extenders don’t fit, print 12x Short Extenders (3 per wall)
Again, the final layout will be the same size across all three print configurations.
L-Shaped Walls
Similar with the Prefab set, you will also need to print the following L-shaped walls to complete the set:
- 4x Interior L-Shaped Wall Sections
- 4x Exterior L-Shaped Wall Sections
These add some much needed cover and line of sight blocking to the inside and outside of the main colosseum walls.
Optional Scaling Tips
Some hobbyists have asked about resizing the terrain to reduce its footprint. A few have had success scaling the X and Y axes of the Prefab Wall pieces to 75%, while keeping the Z axis at 100% to maintain full wall height. This can create a slightly more compact arena without reducing visual impact, although I haven’t tested this setup myself, so I recommend experimenting with one section first if you plan to try it.
Final Thoughts on Printing Colosseum Terrain
This Colosseum terrain 3D print guide is designed to help you get the most out of your STL files, no matter what size printer you have. Both the Gothic and Prefab sets were created with modularity in mind, allowing you to print a full 3×3 arena using long, medium, or short wall segments.
There should be plenty of options for those that want to go off-piste and run their arena with longer wall sections or more openings, maybe even a single entrance.
Additionally, both sets have been updated to add flat walls. As this has been requested by a couple of people looking to make more of an oval-shaped arena to fight in. I can only assume they wanted to run chariots or vehicles around it!
If you have any layout tweaks of your own or want to share painted photos of your Colosseum build, feel free to tag @WargameGeeks on social media or post in the community!
Where to Get the Files?
You can now grab both Colosseum STL sets (the Prefab Colosseum & Gothic Colosseum) through:
Happy Printing!

